Camp Plumbing
The Ins and Outs of Fresh and Grey at WrongtownSimplified Plumbing Layout
Consider using this if you need to provide more context on why you do what you do. Be engaging. Focus on delivering value to your visitors.
There are 4 major components to Wrongtowns Water System
Water Storage
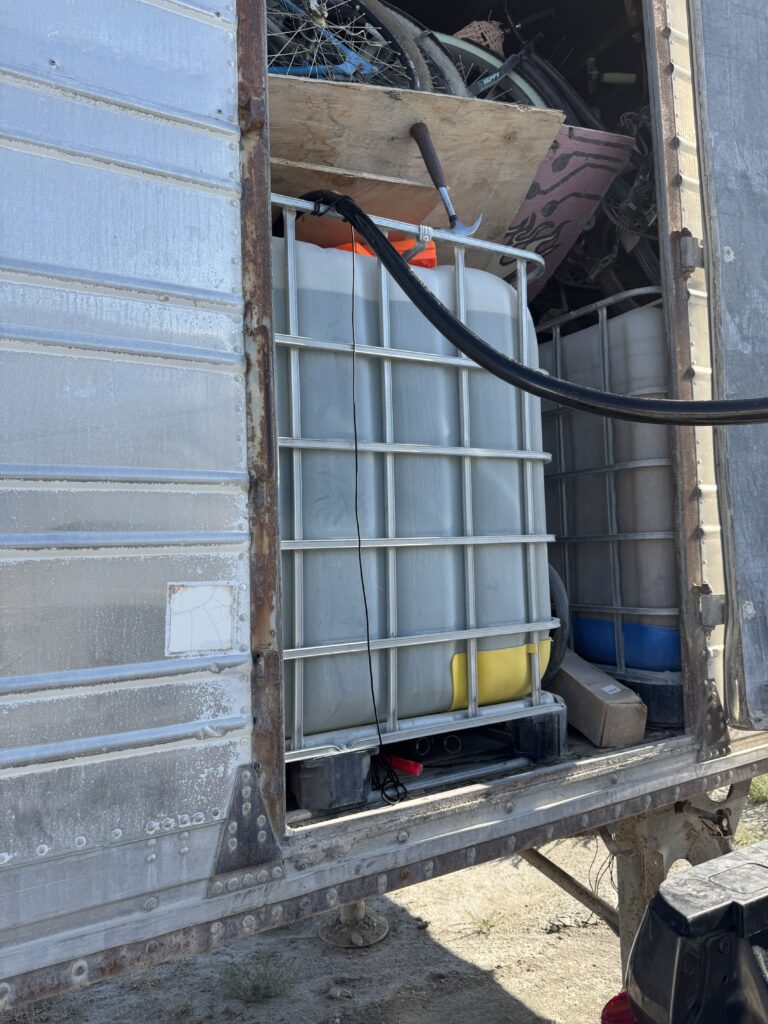
Wrongtown has 8 IBC totes in a 20′ Pup 18 wheeler trailer that are dedicated 4 for Grey Water and 4 for Fresh Water, its a perfectly balanced system so imporatant that a large portion of extra grey water is not introduced to the ecosystem.
Showers and Controls
The Controls for the system are all mounted to the front of the showers. There is 110 power a 12v power source, on demand pump, control valves and a water heater as well as manual control valves for every branch.
Kitchen Sink
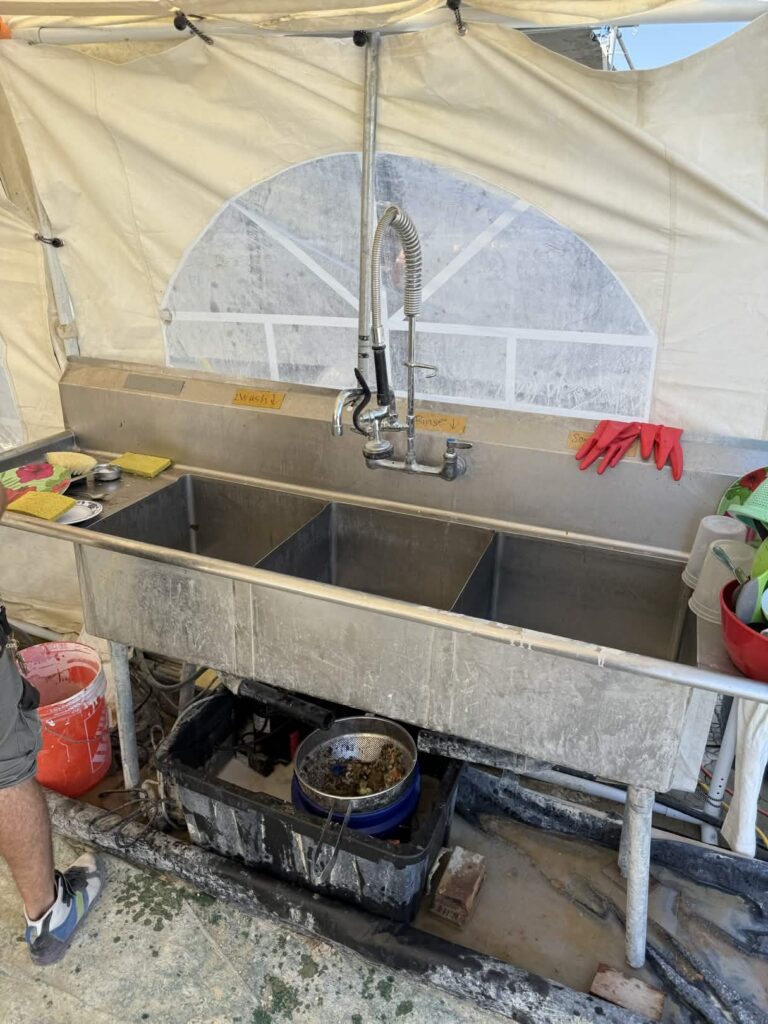
The most critical piece of infastructure, if we run low on water turn off the showers and only run the kitchen sink. Three basin sink with Rinse, Wash and Bleach station. Water should only be run by kitchen crew and not avilable to all campers.
Grey Water Pumps & Storage
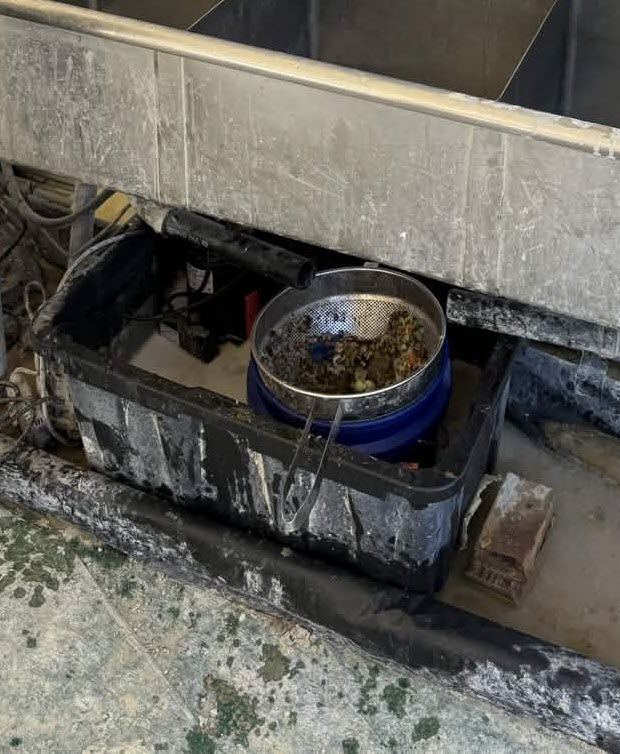
The most tempramental part of the system, pumping dirty used water from the sink and showers to the IBC totes in the trailer. Pumps can clog, float switches can fail, these must be watched and maintained.

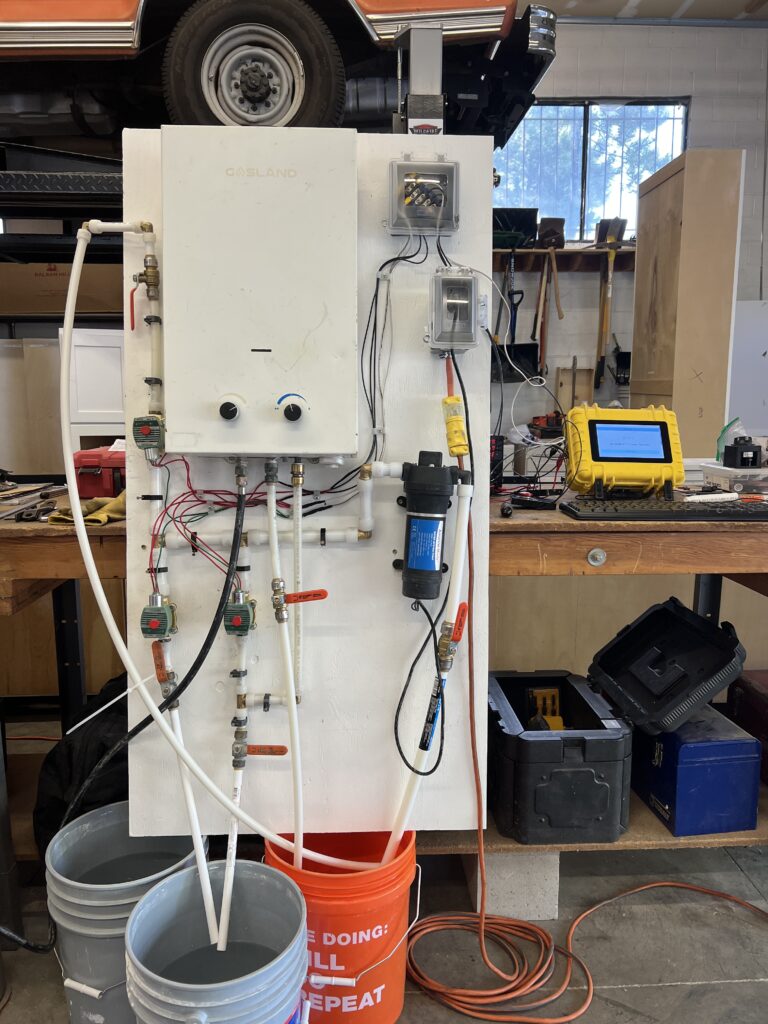
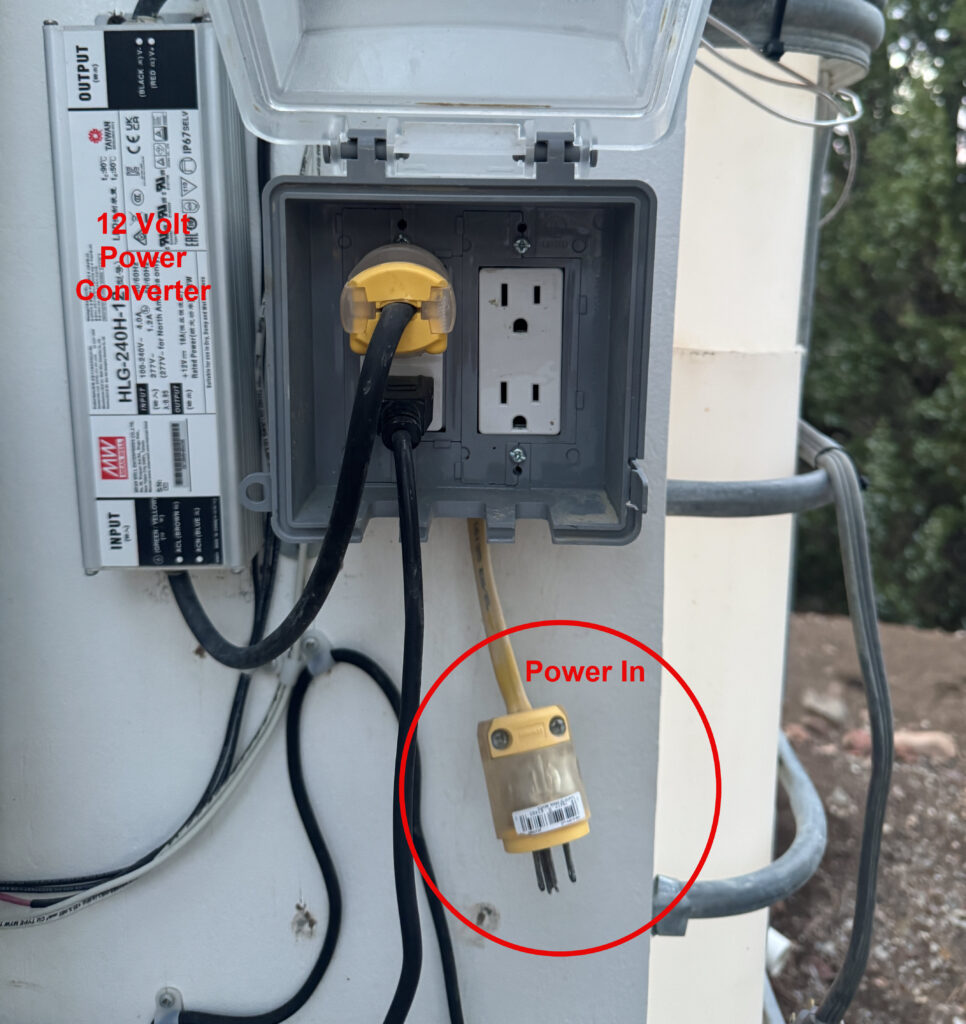
The brains of the system are the control board on the front of the showers
The control board houses the pump, valves and power supply and distro that make the system work. In the picture to the left you can see all the water sources labled
- Shower 1 from Valve to Shower head
- Shower 2 from Valve to Shower head
- Sink Cold Water from Valve to Sink & Water Heater In
- Sink Hot Water from Water Heater to Sink
- Input – Water in from white plastic valve under IBC totes in 20′ trailer
A key component of the Control board is Power
120 Volt Power
This is plug power, you must not unplug this to plug in your own shit. There are plugs in the bar for that. This powers all they fresh and grey water pumps that power the system. You can “lock” this box with a zip tie. Just plug and extension cord into the plug sticking out of the bottom of the box.
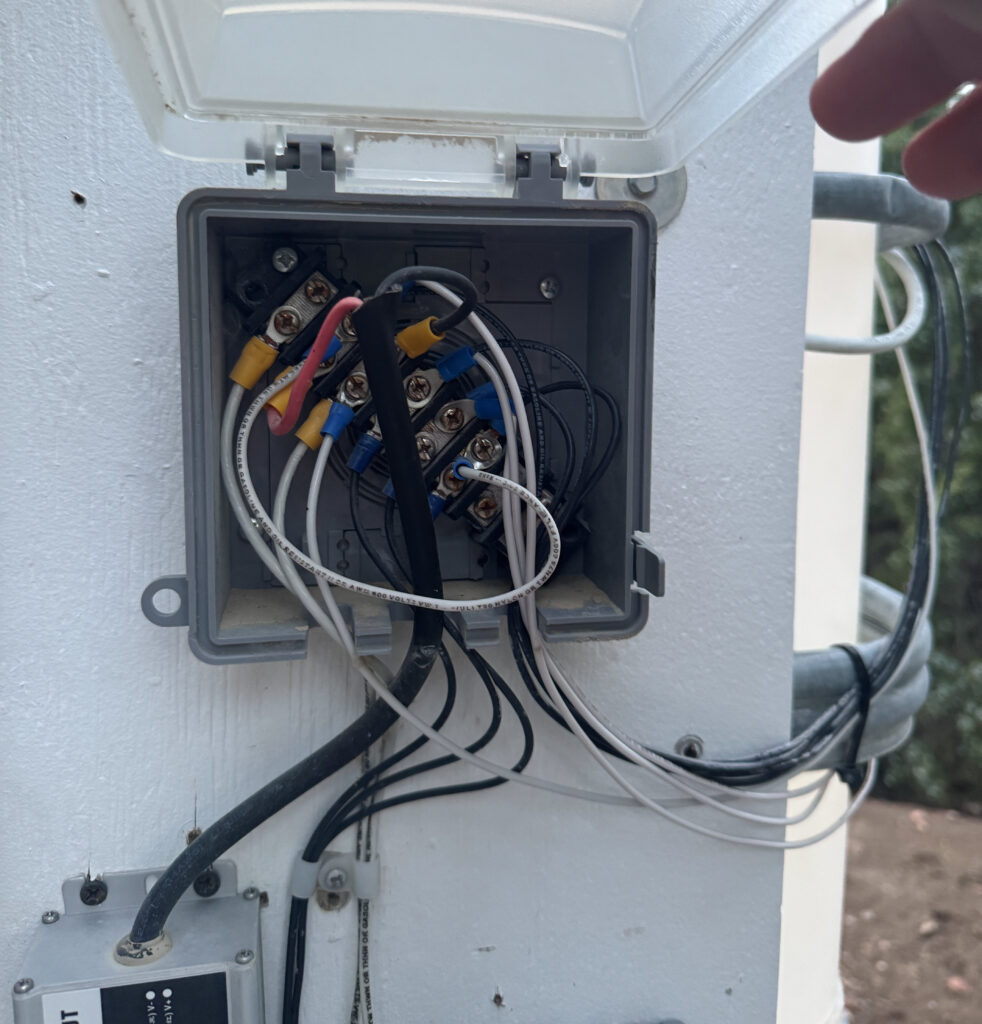
12 Volt Distribution Block
This is the distribution block that runs power to all the valves and FRID or compture system that powers the system. There is 12V + and a 12V ground alway on in the box. This powers the system and if there is no system brains you have to jumper 12+ to the valve controls to keep them open and control the flow with the manual valve handles.
Making the connection, Fresh water out and Grey water in. The Pup Tailer.
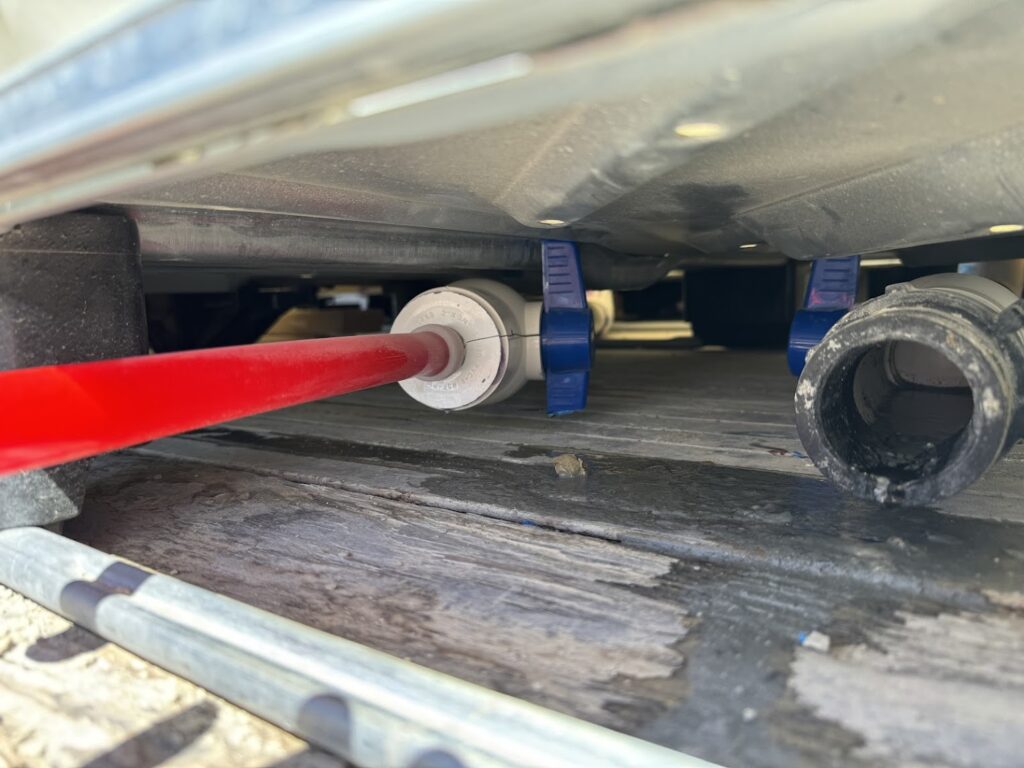
Water to the System
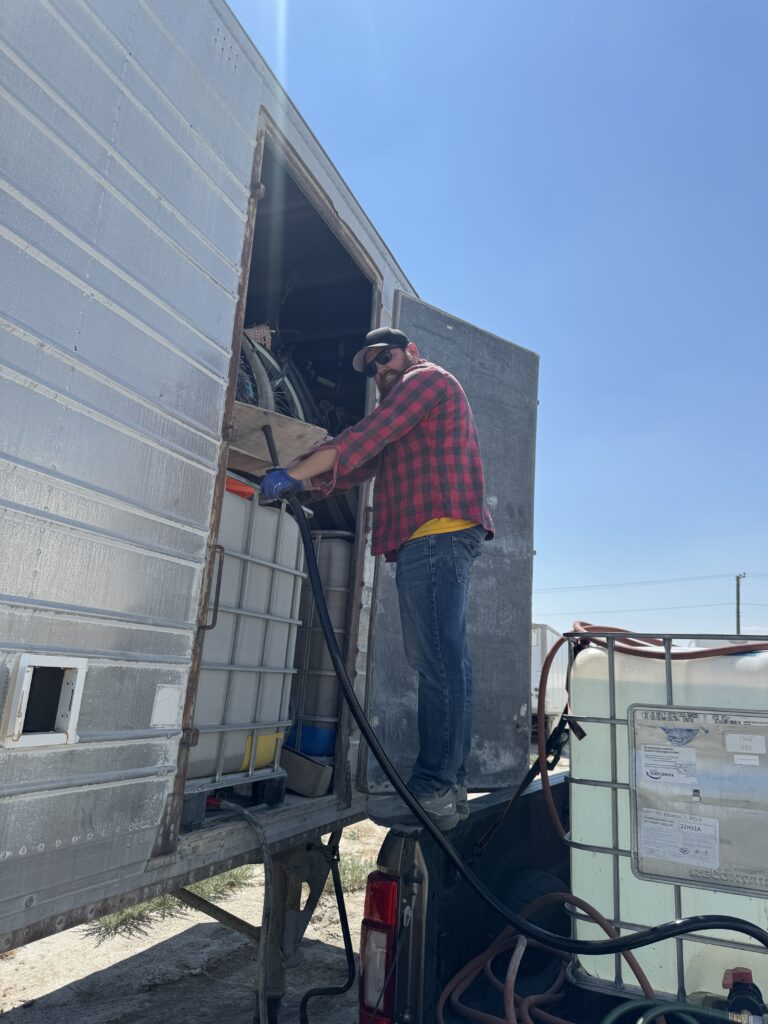
3/4″ Pex Type A – run it with a 3/4″ push sharkbite from this red pipe to the shower water inlet valve which is a 3/4″ sharkbite. Yes this valve is cracked and will crack from time to time winter over winter. You should always have an extra and PVC glue on the work trip. 2″ PVC Valve. Take or have 100′ just in case you have to run extended distance.
Water from Control Panel to Sink
1/2″ Pex Type A – Run from pipe 3 and 4 in photo to the fixture. Fixture has sharkbite fittings as do the valves on the contorl board. Take 100′ of 1/2″ with you and place the shower next to the kitchen. You need 8 Mill black UV resistant plastic to place under the shower trailer and 30′ of linear boad feet of 2×4 for the shower encatchment.
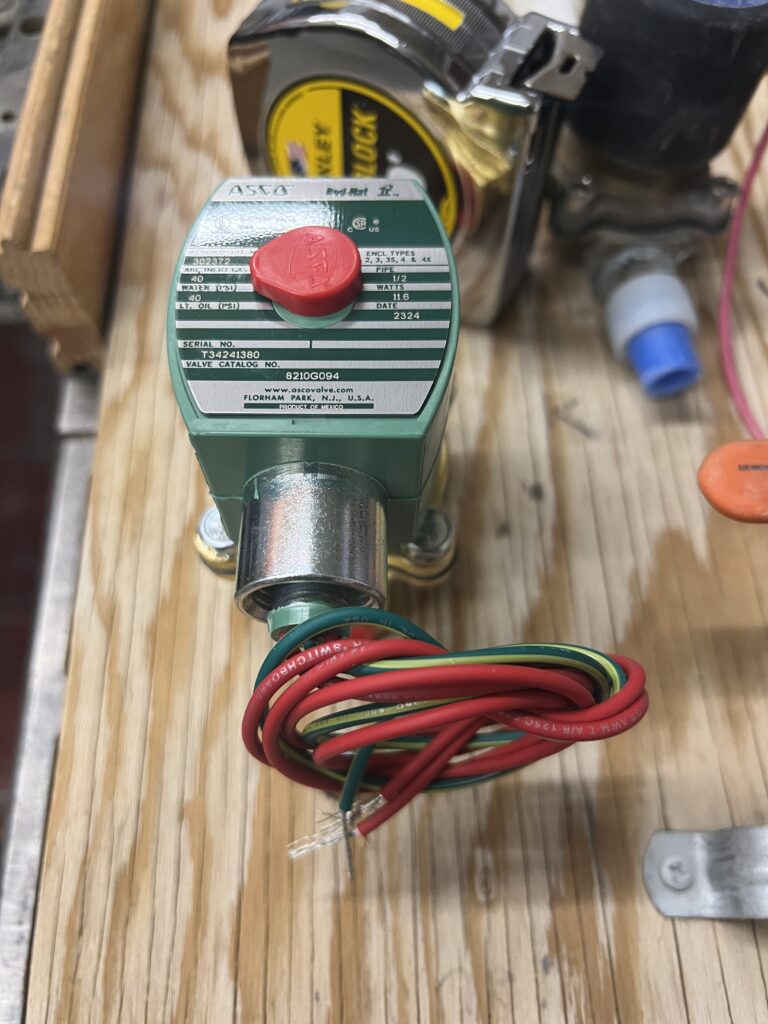
Rebilding the Valves
ASCO Redhad Valves
From time to time debree gets caught in these valves and they stop functioning correctly. The major symptoms are either running all the time or not cycling correctly (water always flowing through the valve or not flowing at all). First unplug the 12 Volt power supply. Next you have to remove the four silver bolts you can see on the right and remove any crap caught up in the rubber membrain. DO NOT lose the SPRING that is in between the two pieces.
After cleaning the membrain and washing any debree out, re-assemble the peiece back together and plug the power back in it should start cycling correctly.
Add an overline text
Work Trips
Empty The Grey Water
On the first work trip empty the grey water accumulated from the last burn. Its stinky but not that bad, its just sink and shower water. Its highly bleached water sitting in the 4 forward totes in the 20′ trailer. Open the small access doors on the 20′ trailer and then open the valves on each of the grey water totes and yuck will start to flow out of the outlet pipe (Black Cover in the picture to the left).
Items to Bring:
Fill the Fresh Water
On the second work trip fill the fresh water totes, the four rear totes in the 20′ trailer, with fresh water and 1 cup bleach. Open the access doors on the side of the trailer and open the handles on each of the totes and run the fill hose into the container closes to the ‘man door’ in the side of the trailer (Tote in the picture to the right). If all the handles are open they will all fill over time. Make sure the outflow handle in the picture above is closed before you start to fill, also make sure all the water from the year before has been emptied.
Items to Bring: